Our first bikepacking trip: the Wharfedale Track
Ever since Barry and I moved to Christchurch and bought bikes, bikepacking has been on our bucket list. There’s something incredibly fulfilling about being out on new trails, carrying just what you need for an overnight adventure — knowing you’ll have to put in a bit of extra work for the kms (with the added weight), but that the descents will make it all worth it. Knowing too, that before you go anywhere, you’ll have to solve that fun puzzle of how to fit all the gear on your bike. Bonus points if you can do it without bickering with your partner!
Our initial plan was to bikepack the Wharfedale Track over Christmas, but by the time the 25th of December rolled around, we hadn’t quite figured out how to load all of our gear, plus the camera and 3 lenses (including a pretty heavy telephoto!).
Unsurprisingly, a wee bit of bickering ensued.
Eventually, we got our sh*t together…and on the last day of the year, we finally cracked into our first bikepacking trip.
Why bikepack the Wharfedale Track?
It’s accessible — from Christchurch, the start of the track is just over an hour’s drive.
The terrain has something for everyone — from techy sections and challenging climbs to nice flowy descents, this ‘blue’ track is as challenging as you make it. For more specifics, check out the description on Trailforks. If “exposed roots, fords and plenty of rocks” don’t put you off, this is the track for you!
Amazing views — most of the track is through forest so you’re sheltered from the sun (another bonus) but every once in a while you get breaks in the bush and are treated with gorgeous views, looking out over Oxford Forest.
There’s an option of making it a loop — if you don’t want to do a “there and back” mission on the same trail, from Wharfedale Hut you can continue on to Townshend track, which meets Lees Valley Road. While it’s less technically challenging than Day 1, there are still plenty of river crossings on Townshend Track (opportunities for a dip too!) a few uphill slogs and a couple of unmarked areas where it’s easy to miss the track markers. Follow Ashley Gorge Road back to Oxford and stop for a meal and pint at the Black Beech Wine Bar — the pizza and beers are delicious! Then ride the final leg (~15km) back to your car. Our car has rather low clearance and as we were biking after rain, the fords were full so we had to park on Limeworks road. All up we clocked ~52km, 659m elevation gain on Day 2.

Day 2: Crossing the bridge on a section of Townshend Track
A couple of quick watchouts:
At the time we biked the Wharfedale track, it had suffered severe damage from storms/floods so sections of the track had been washed away. If this is still the case, you may have to carry your bike in sections or over obstacles, not an easy task with all the added weight on the bike!
The track is susceptible to the conditions and can get very muddy; on Trailforks the consensus is that it’s also a grade harder when wet or muddy.
Wharfedale Hut and facilities
It’s ~15km from the Wharfedale track car park to the Wharfedale Hut. We started quite late, around 4pm, and the track took us longer than expected on Day 1, mainly due to the damage (especially on the section from the saddle to the hut) which resulted in a fair bit of bike-pushing and carrying. If the track was in better condition, I’d estimate it would take about 3.5 hours.
By the time we got to the hut at 9pm, it was a relief – though I’m sure the lovely couple staying at the hut didn’t appreciate our late intrusion; ah well!
The hut is pretty basic with no running water or cooking facilities. We cooked outside on the bench (and had some much needed celebratory wine). There is a nearby stream to get water. The toilet is a basic long drop – the next day when once the sun was out in full force there were lots of wasps, so I’d suggest doing your business early in the morning!
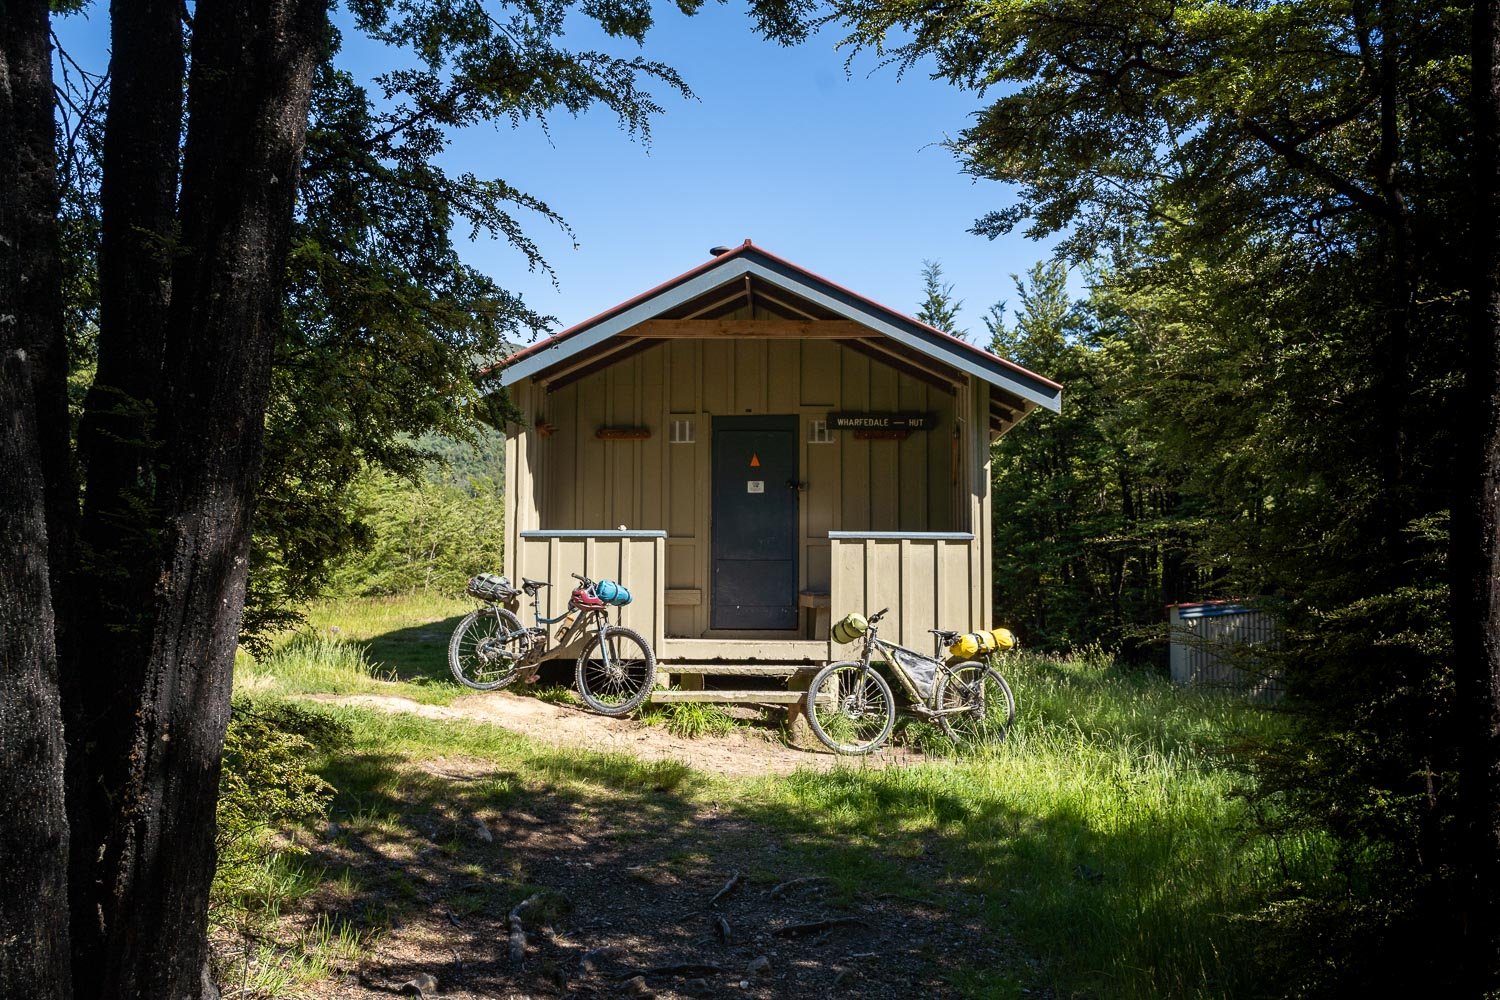
The Wharfedale Hut — it’s cute!
Bikepacking gear shakedown – what we brought
Bikes – I brought my full suspension mountain bike, while Barry brought his hardtail. We saw one person arrive with an e-mtb as well. Whatever you decide to ride, I would definitely recommend a bike with grippy tyres.
Bike racks – We bought 2 x Spider Rear Racks and 2 x Cradles from aeroe, a Kiwi company, providing an innovative and versatile way to carry gear on your bike. It was great to support local with gear designed and tested in New Zealand.
Bike bags – We chose our most heavy-duty dry bags for the Spider racks and Cradles. (Unfortunately mine got tyre-rub during one section and ended up with a hole). I also used a Topeak top tube bag (really handy for keeping snacks, insect repellent, a phone and sunscreen!) while Barry carried a frame bag.

A cosy night’s sleep in the lightweight Macpac Firefly 200
Backpacks – Barry used the Macpac Amp Ultra 15L Vest while I had an Osprey 18L backpack; since the trip I have gone in and bought the Macpac vest myself! It sits a lot snugger than a backpack (with no annoying movement or bouncing) plus has plenty of capacity and pockets for snacks.
Sleeping bags and mats – When you’re bikepacking, every gram makes a difference! I brought Macpac’s lightweight sleeping bag the Firefly 200 on the trip with me; it packs down tiny and is zipperless, which further cuts down the weight. The standard size bag comes in at a mere 467g. Tip: Roll your sleeping bag and mat together, they combine to form a larger cylindrical bundle which you can stick into a dry bag and attach easily to your handlebars.

Barry loving the Macpac Amp Ultra 15L Vest
Clothing – I carried a spare (synthetic, quick-drying) tee, underwear, socks, a light down jacket and lightweight windbreaker, merino bottoms, a buff and warm hat. I only brought one pair of mountain bike shorts on the trip, knowing they were quick-drying, durable and abrasion resistant, so any mud or water wouldn’t affect the next day’s riding. I also strapped hiking sandals to the outside of my rear bag, handy for walking around in the hut or getting water from the stream, giving my shoes a chance to dry out at the hut.
Food/Kitchen
Hydration: Tailwind endurance fuel in our drink bottles, plus a ziplock bag with 4 scoops for the next day. There’s no water at the hut, so you can get it from the stream nearby.
Dinner: Backcountry Cuisine pouches
Breakfast: Oats in a small sachet, with milk powder already mixed into them, coffee and an aeropress + filter.
Snacks: Assortment of muesli bars, a small bar of chocolate, small pack of lollies,
Extras: 3 small bottles of red wine (it was New Years Eve after all!) and a few tea bags.
Cooking: Small gas canister and stove (built in igniter).
Accessories – toiletries, sunscreen, insect repellent
Extras – next time we’ll bring extra bungees or cords, they’re always handy to strap small things on top your pack.
It’s funny that when an adventure ends, despite all the hard bits, you always look back on it fondly. A couple of weeks later we’ve already forgotten the bike pushing and carrying and I’m ready to tackle it again as a day trip.